
 EN
EN

What Is a Paper Cup Machine and Its Core Operating Principle?
A paper cup machine is production equipment that turns pre-printed, die-cut paperboard blanks into finished drinking cups through a controlled series of feeding, forming, sealing, bottoming, curling, and collection actions. The simplest way to understand a paper cup machine is not as one press, but as a line of linked stations. Each station prepares the workpiece for the next one. When paper, tooling, heat, timing, and collection are aligned, the result is a cup with a stable side seam, a secure base, and a usable rolled rim.
From a production-line observer’s viewpoint, the operating principle matters because it explains where quality is created. A finished cup is not made by one sealing action. It is the outcome of material handling and forming operations that must stay synchronized. That is also why a paper cup machine should be assessed against the intended cup shape, paperboard construction, coating system, and operating routine rather than by headline speed alone.
What does a paper cup machine make?
A paper cup machine typically makes single-use cups from paperboard blanks prepared upstream. The blank becomes the cup wall; a separate round blank becomes the bottom. Depending on the application and material system, the equipment may use heat, hot air, or ultrasonic energy for the cup-wall seam. The exact sequence and hardware differ by configuration, but the core manufacturing logic remains consistent: shape the wall, join the seam, add the bottom, seal the interfaces, finish the rim, and discharge the cup for inspection or packing.
This distinction is useful for buyers. A cup body can look correct even when the seal interface is not fully suited to the coating or the setup. For that reason, machine discussions should include the paperboard and barrier layer, not only cup capacity. A paper cup machine works with a material system, rather than independently of it.
The core operating principle: a station-by-station process
1. Feeding and separating the cup-wall blanks
The cycle starts when a magazine or feeding mechanism presents one pre-cut cup-wall blank at a time. Separation is important: doubled blanks, poor alignment, or inconsistent feeding can interrupt the process before the forming stage. In a paper cup machine, the blank must arrive in a repeatable position so that the printed side, overlap area, and later bottom joint all line up correctly.
2. Curling the blank into a cylindrical cup body
Next, forming components guide the flat blank around a mandrel or forming mold. The two edges overlap to create the side seam. This is the first visible transformation from sheet material to a cup shape. A paper cup machine does not merely bend paper; it establishes the geometry that every later operation depends on. If the overlap is unstable, the cup can show a weak seam, inconsistent diameter, or downstream sealing difficulty.
3. Sealing the side seam
The side-seam area is activated and pressed so the overlap bonds. Many machines use heat-related methods, while some configurations use ultrasonic sealing. The appropriate approach depends on the cup material and machine design. It is better to confirm compatibility through material and sample trials than to assume one sealing method suits every coated paperboard. In practical terms, the paper cup machine needs sufficient, controlled sealing energy and pressure without damaging the material or distorting the body.
A paper cup sealer is often discussed in the same breath as a cup former, but the terms can refer to different equipment or process points. In cup forming, the seam-sealing unit is part of the machine cycle. Separate sealing equipment may instead be used for closing a filled cup with a lid or film. Clarifying the production task avoids buying the wrong equipment for the job.
4. Feeding, inserting, and attaching the bottom
While the wall is held in shape, the machine feeds a circular bottom blank. The bottom is inserted into the cup body and joined around its perimeter. This phase turns a tube into a container. A paper cup machine relies on coordinated transfer timing here: the body, bottom blank, mandrel, and sealing elements must meet in the correct position. Misalignment can lead to an uneven base or a joint that needs further investigation during leak checks.
5. Heating, knurling, and stabilizing the base joint
After bottom insertion, the base interface is treated and mechanically formed to secure the joint. Machines may use heat to activate the seal layer, followed by knurling or rolling actions that compress and shape the connection. The exact tooling arrangement varies, but the goal is the same: create a continuous bond around the bottom edge. This is one reason paperboard coating consistency matters. A paper cup machine can repeat a programmed motion accurately, yet the finished result still depends on the material responding consistently to that motion.
6. Curling the rim and discharging the cup
The upper edge is curled to form the familiar drinking rim. A smooth, even curl improves handling and gives the cup its finished profile. The cup is then removed from the forming position and collected. At this point, an operator or downstream quality process can inspect appearance, seam condition, rim shape, and base integrity. A paper cup machine should make these checkpoints accessible, because easy observation helps a team spot trends before they become waste.
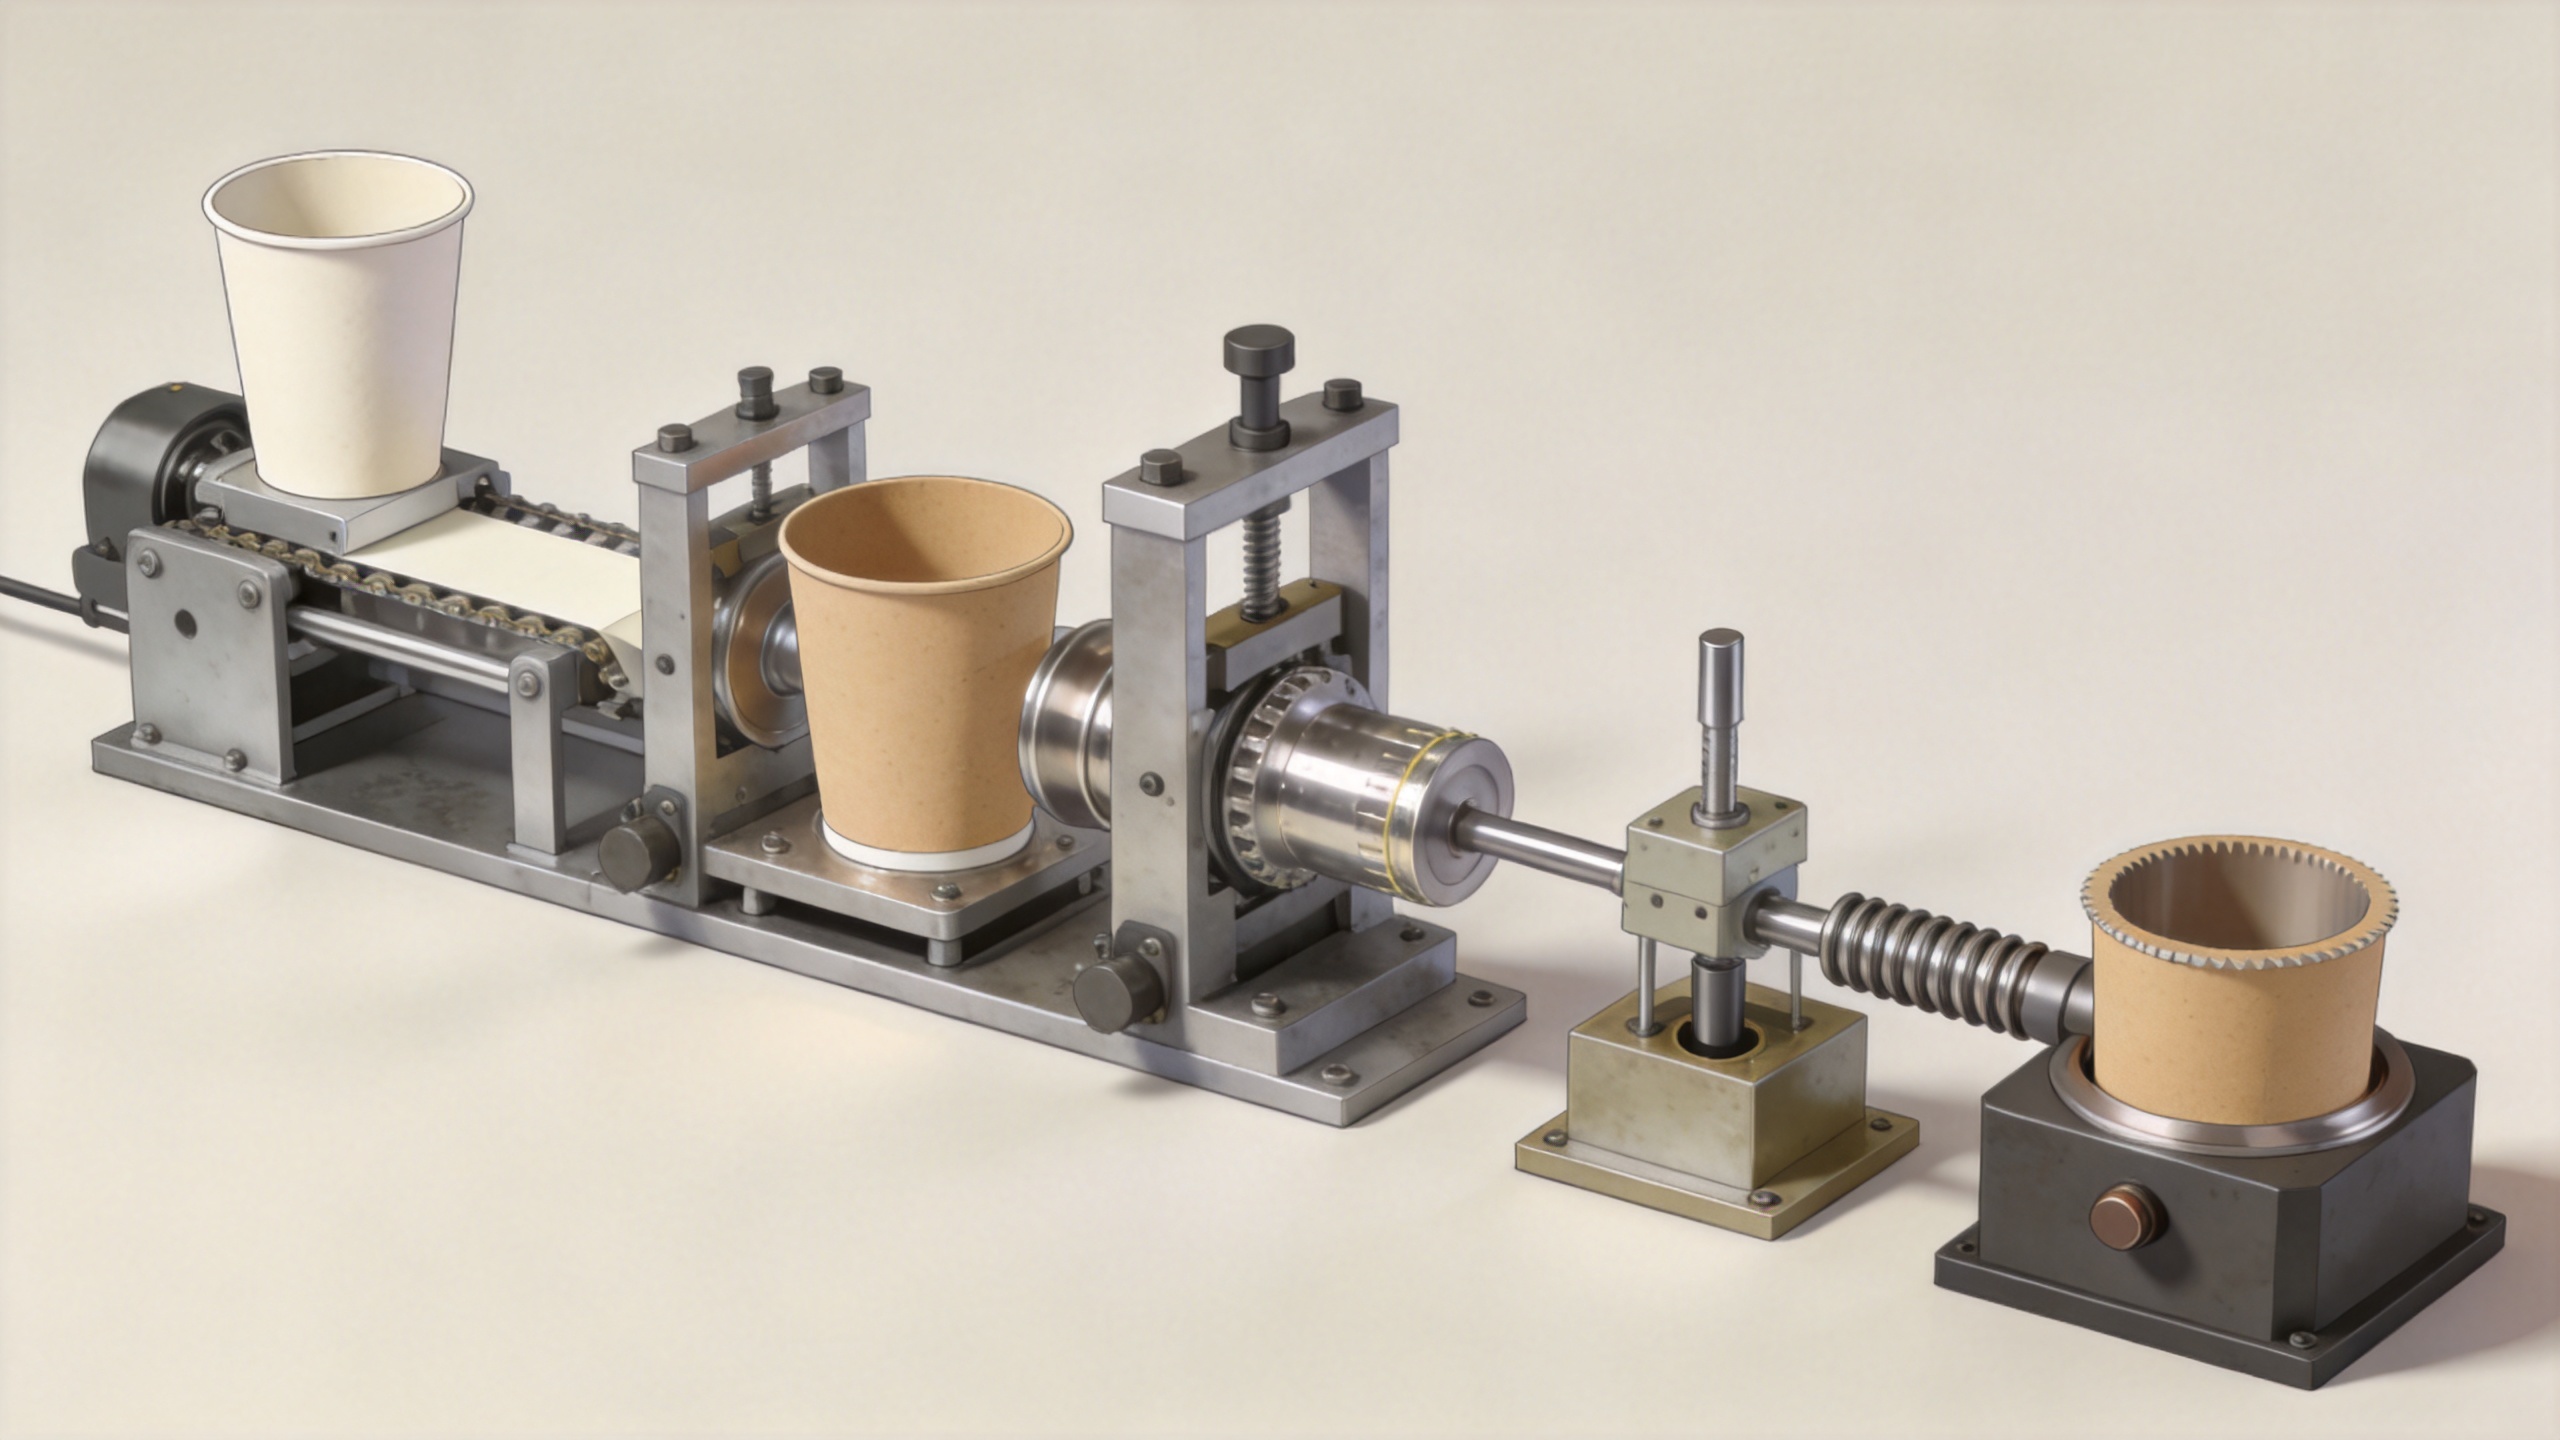
Why a horizontal paper cup machine may be considered
A horizontal paper cup machine describes a layout in which forming stations are arranged around a horizontal working path or table. The phrase should not be treated as a universal performance claim: actual station count, automation, and access differ by model. Still, buyers may consider a horizontal paper cup machine when they want to review how blanks travel through stations, how operators access adjustments, and how the layout fits their planned workflow. The useful question is not whether horizontal is automatically better, but whether the configuration supports the target cup sizes, material behavior, changeover pattern, and maintenance capability.
What determines stable cup quality?
Three practical checks help connect the operating principle to real production. First, confirm the cup-wall blank and bottom blank specification with the intended barrier or coating; a paper cup machine cannot compensate for an unsuitable material combination. Second, observe the path from feeding through collection. Feed stability, blank orientation, seam appearance, bottom alignment, and rim formation tell a more complete story than one isolated setting. Third, agree on acceptance checks before production trials, including the cup size, intended liquid use, visual criteria, and leak-test method.
It is also sensible to record exceptions instead of only describing the final defect. If a cup leaks, note whether the issue appears at the side seam or base, whether it follows a material batch, and whether it occurs after a setup change. Those observations help technicians distinguish between an adjustment issue, a tooling condition, and a material-compatibility question.
A practical buying and setup checklist
- Define cup diameter, height, capacity, and any special shape before discussing a paper cup machine.
- Provide representative cup-wall and bottom materials for compatibility review and trial forming.
- Ask how the side seam and bottom joint are formed for the proposed configuration.
- Review changeover tasks if more than one cup size is planned.
- Check how operators can reach feeding, heating, forming, and collection areas for cleaning and routine inspection.
- Set measurable acceptance criteria rather than relying only on a visual sample.
Final takeaway
The core principle of a paper cup machine is sequential conversion: a flat wall blank becomes a sealed cylinder, a bottom is inserted and secured, and the rim is finished before the cup is collected. The process is straightforward in concept but sensitive to material, tooling, heat, timing, and handling. When comparing a paper cup machine, start with the intended cup and paperboard, then examine how each station supports a repeatable forming path. That approach gives a more useful foundation for trials, operator training, and quality control than treating the machine as a single black box.
 ONLINE